Wednesday, July 9, 2008

Desktop publishing tools and PENS

I've written before about how PENS can be used to enable one-click publishing from a publishing system (authoring tool or LCMS). Herewith, some notes on using PENS with desktop, as opposed to web-based, tools.

PENS requires that, when a publishing system sends a request to the LMS to “collect” a content package, it supplies a URL (typically using one of http, https or ftp for the URL scheme) from which the package can be collected. If the publishing system is web-based, then this URL will typically refer back to the publishing system itself.

For a desktop publishing system, this requirement effectively means that there needs to be a server, separate from the desktop software, to which the content can be uploaded prior to being collected by the LMS. Typically this will be an FTP server, although it could in principle be a web server.

Ideally, the desktop software will enable the user to configure details of this FTP server (including host, user name and password) in addition to the LMS details. When a course is published, the software should perform the following actions:

  • package the content into a zip file;
  • upload the content package to the FTP server using the configured host, user name and password; and
  • send a PENS request to the LMS instructing it to collect the content package from the FTP server.

In principle, it would be possible to manually upload the content package to the FTP server if the desktop software does not do this automatically. In practice, though, this really defeats the purpose of using PENS, since it would be simpler to create a SCORM or AICC content package on the desktop machine, and then upload the package directly to the LMS.

Another theoretical possibility would be to run a web or FTP server on the desktop machine itself. However, this would require that the desktop machine has a stable IP address and/or host name that the LMS can call back to, and that HTTP or FTP requests to the desktop machine are not blocked by hardware or software firewalls. In other words, it's almost guaranteed not to work in practice.

In summary, a desktop publishing system can theoretically “support” PENS without also supporting the automatic FTP upload step. However, without this automatic FTP upload, PENS is unlikely to provide any practical benefit.

Sun Java Plug-in bug and SCORM communication

A few users have encountered the following issue that affects tracking of SCORM courses on a small number of EKP sites.

Symptoms: SCORM courses fail to communicate with EKP, and one or more messages like the one below appear in the browser's Java console.

java.security.AccessControlException: access denied (java.net.SocketPermission www.example.com:80 connect,resolve)

Analysis: This issue is caused by a bug in certain versions of Sun's Java Plug-in. The bug was introduced in Java 6 Update 3, and is fixed in Java 6 Update 10. It affects Firefox and Safari; Internet Explorer is not affected.

Note that this problem does not affect all sites. It appears to affect a small proportion of sites, and is related to the site's DNS configuration.

Solution: Users who encounter the problem described above can apply one of the following solutions.

  • Ensure that your users are using a version of the Sun Java Plug-in that is not affected by this problem. Users who currently have Java 6 Update 3 or above can upgrade to Java 6 Update 10. (Note that, as of 9 July 2008, Update 10 is flagged as “beta.” However, it is the first version offered on the downloads page.)
  • Another solution that appears to be effective is to ensure that each EKP domain (e.g. ekp.example.com) is mapped (via DNS) to a unique IP address. That is, where multiple EKP instances are located on a single server, ensure that each instance on the server is associated with a different IP address.

Sunday, June 15, 2008

When do I need to use the Content Server Configuration settings in EKP Gold?

EKP Gold includes a Content Server Configuration page (under Manage > System Administration Manager > System Settings). However, it's not always necessary to explicitly configure a content server in order to enable learners to launch courses from servers other than the EKP server. Herewith, clarification of when it's necessary to explicitly configure a content server, and when it isn't.

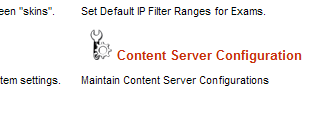
Content Server Configuration menu item

EKP's content server configuration settings are designed to help you deliver courses to groups of learners whose connections to the main EKP server have limited bandwidth. You can upload the same course content to multiple content servers, and ensure that, when a learner launches a course, the course content will be delivered to the learner from a server that provides optimal delivery speeds. (The choice of server can be based on either the learner's identity or their network location.)

For example, suppose you need to deliver courses to employees located in your brand new lunar office. Since bandwidth between the moon and Earth is limited, you would like to ensure the course content is delivered to your lunar employees from a dedicated lunar content server, while Earth-based employees will continue to receive course content from your Earth-based server. You can use EKP's content server configuration to ensure that lunar employees receive course content from moon.example.com, while terrestrial employees receive the same content from earth.example.com.

However, there are other reasons besides bandwidth why you might want course content to reside on a different server from EKP. For example, the course content might require a server-side scripting language that is not available on the EKP server. Or the courses might be provided by a vendor that hosts the content themselves instead of providing it as files to be uploaded to an LMS server (which can be extremely convenient if the content is updated frequently). In these cases, although the content for a particular course will be delivered from a content server separate from the main EKP server, it will always be delivered from the same server regardless of the learner's identity and network location.

If the content of any particular course should always be delivered from the same server, even if it is not the main EKP server, then it's not necessary to explicitly configure any content servers, and it's not necessary to be running EKP Gold. In this case, it's only necessary to ensure that the relevant launch URLs accurately reflect the location of the course content (which might require that they be specified as absolute, rather than relative, URLs), and this will work just fine on EKP Silver or EKP Bronze. Note that it's still possible to import the EKP course catalog entries from SCORM or AICC content packages even if the course content will not reside on the EKP server; however, in this case the packages will typically contain only course description files (i.e. imsmanifest.xml and related files in the case of SCORM-conformant courses, or AICC course structure files in the case of AICC-conformant courses), and not the actual course content files. Note also that you might still need to work around cross-site scripting issues—however, it's generally more straightforward to do this by setting up a reverse proxy on the EKP server rather than by explicitly configuring content servers in EKP.

(To be really precise, we should state that content server configuration is required only if the host portion of any course content URLs needs to change based on the learner's identity or location—for example, http://earth.example.com/path/to/content versus http://moon.example.com/path/to/content. This is not quite the same as stating that the courses need to be launched from different servers, since it is possible to map a single host name to multiple physical servers—for example, the single host name earth.example.com might be mapped to multiple physical servers. However, this difference is unlikely to matter in practice unless special content distribution technology is being used.)

Saturday, June 7, 2008

How can I change the size of the navigation frames for a course with multiple SCOs or AUs?

When you launch a SCORM course with multiple shareable content objects (SCOs), an AICC with multiple assignable units (AUs), or a course created using the Courseware Manager with multiple lessons, EKP provides one or more frames containing navigation controls that the learners can use to navigate between the SCOs, AUs or lessons of the course.

If you are using EKP Gold or EKP Silver, you can change the size of these frames by creating a custom courseware template, provided that you have the appropriate administrative privileges. The steps are as follows.

  • Create a courseware template package. You can use the files under nd/fresco/template/course/default as a guide. Copy the files to a new folder, edit default.css as required, then package the files as a zip file, ensuring that default.css is in the root of the package. (Note that you do not need to edit default.css to change the size of the navigation frames, but you can change the fonts and colors used for the navigation controls.)
  • Go to Manage > Courseware Manager > Courseware Template Editor, and click the Create button.
    Create button
  • In the new window, enter a name for the template, then click the Browse... button and select the courseware template package (zip file) you created.
    Name and zip file selection fields
  • On the next page, click the top frame in the image.
    Top frame image
  • In the Top Frame window, enter the desired height for the top frame. You can specify the height as a percentage of the total window height or as an absolute number of pixels.
    Height field
  • Set the width of the left frame by clicking the left frame in the image.
    Left frame image
  • Click Update to save the courseware template settings.

You can configure a course with multiple SCOs, AUs or lessons to use your custom template by opening the course in the Catalog Editor, clicking Navigation Setup in the left frame, selecting your custom template from the Template drop-down list, then clicking the Save button in the top frame.

Courseware Template Selector

Note that EKP needs to provide navigation controls for a course with multiple SCOs, AUs or lessons in order to ensure correct tracking, so you cannot remove the navigation frames. For a more detailed, see my earlier post.

Monday, May 26, 2008

Code samples: invoking APIs using C#

I've previously posted sample code that demonstrates how to invoke EKP's APIs using Java and Visual Basic. Herewith, equivalent code using C#.

As with modern Visual Basic, C# is a .NET-based language. It's therefore fairly straightforward to translate our previous Visual Basic sample code into C#. As with the Visual Basic code, we will use an instance of System.Net.WebClient to make the API calls.

System.Net.WebClient client = new System.Net.WebClient();

Again, we need to set the credentials that WebClient will use for the HTTP basic authentication process. We must set the user name to a non-empty value to ensure that WebClient sends the authentication header, but the exact value doesn't matter since EKP ignores it. The password must match the value of the authentication.key property configured in the file WEB-INF/conf/ekp.properties.

String userName = "dummy";
String key = "mysecretkey";
client.Credentials = new System.Net.NetworkCredential(userName, key);

To create a user account, we send an HTTP POST request to /ekp/contentHandler/usersCsv, including CSV-formatted data in the body of the request.

String data1 = "Action,UserID,Password,FamilyName,GivenName\r\n"
             + "A,joestudent,dummypass,Student,Joe\r\n";
client.UploadString("https://ekp.example.com/ekp/contentHandler/usersCsv",
                    data1);

Similarly, we can enroll the user in a course with ID Derivatives_101 by sending an HTTP POST request to /ekp/enrollmentHandler, again including appropriately-formatted CSV data in the body of the request.

String data2 = "USERID,LEARNINGID\r\n"
             + "joestudent,Derivatives_101\r\n";
client.UploadString("https://ekp.example.com/ekp/enrollmentHandler", data2);

Sunday, May 25, 2008

Code samples: invoking APIs using Visual Basic

I've previously posted sample Java code that demonstrates how to invoke EKP's APIs. Herewith, equivalent code using Visual Basic .NET.

The .NET platform provides a couple of classes for sending HTTP requests, specifically System.Net.HttpWebRequest and System.Net.WebClient. Either will do the job. However, WebClient is a little simpler to work with, so that's what we'll use.

Dim client As Net.WebClient = New Net.WebClient()

API requests must include an HTTP basic authentication header. Fortunately, both WebClient and HttpWebRequest have built-in support for HTTP basic authentication, so this is straightforward. The user name is ignored by EKP; however, we must set the user name to a non-empty value, otherwise WebClient won't send the authentication header. The password must match the value of the authentication.key property configured in the file WEB-INF/conf/ekp.properties.

Dim userName As String = "dummy"    ' any non-empty value is okay
Dim password As String = "mysecretkey"
client.Credentials = New Net.NetworkCredential(userName, password)

To create a user account, we send an HTTP POST request to /ekp/contentHandler/usersCsv, including CSV-formatted data in the body of the request.

Dim data1 As String _
        = "Action,UserID,Password,FamilyName,GivenName" & ControlChars.CrLf _
        & "A,joestudent,dummypass,Student,Joe" & ControlChars.CrLf
client.UploadString("https://ekp.example.com/ekp/contentHandler/usersCsv", _
                    data1)

Similarly, we can enroll the user in a course with ID Derivatives_101 by sending an HTTP POST request to /ekp/enrollmentHandler, again including appropriately-formatted CSV data in the body of the request.

Dim data2 As String = "USERID,LEARNINGID" & ControlChars.CrLf _
                    & "joestudent,Derivatives_101" & ControlChars.CrLf
client.UploadString("https://ekp.example.com/ekp/enrollmentHandler", data2)

Saturday, May 17, 2008

Which catalog fields can EKP extract from the metadata in a SCORM package?

When you import a SCORM or IMS content package, EKP scans the file named imsmanifest.xml that every such package must contain, and extracts certain key information including: the course identifier; the title of the course; and information about the structure of the course including URLs and additional parameters used to launch the individual SCOs and assets.

In addition to this essential information, the package may also contain metadata in the form of a Learning Object Metadata (LOM) XML instance (either embedded in imsmanifest.xml itself, or else in a separate file referenced from imsmanifest.xml). If present, EKP can extract from this metadata any or all of the catalog fields listed below.

  • Description
  • Vendor
  • Duration Comments
  • Objectives
  • Training Hours

Shown below is a minimal LOM XML from which EKP can extract all of the additional catalog fields listed above. The relevant field values are shown in bold text. This example follows IMS LOM as used in SCORM 1.2 packages; however, the same information could be extracted from an IEEE LOM as used in SCORM 2004, and the differences would be minor.

(Note that this is a minimal XML instance from which EKP can extract the values mentioned above. The LOM XML schema denotes as mandatory some elements that are not actually required by EKP, hence this example is not actually valid against the schema, and the SCORM conformance test suite will report it as invalid.)

<lom xmlns="http://www.imsglobal.org/xsd/imsmd_rootv1p2p1">
   <general>
      <description>
         <langstring>Description</langstring>
      </description>
   </general>
   <lifecycle>
      <contribute>
         <centity>
            <vcard>ORG:Vendor</vcard>
         </centity>
      </contribute>
   </lifecycle>
   <educational>
      <typicallearningtime>
         <datetime>02:30:00</datetime>
         <description>
            <langstring>Duration Comments</langstring>
         </description>
      </typicallearningtime>
   </educational>
   <classification>
      <purpose>
        <value>
           <langstring>Educational Objective</langstring>
        </value>
      </purpose>
      <description>
         <langstring>Objective #1</langstring>
      </description>
   </classification>
   <classification>
      <purpose>
        <value>
           <langstring>Educational Objective</langstring>
        </value>
      </purpose>
      <description>
         <langstring>Objective #2</langstring>
      </description>
   </classification>
   <classification>
      <purpose>
        <value>
           <langstring>Educational Objective</langstring>
        </value>
      </purpose>
      <description>
         <langstring>Objective #3</langstring>
      </description>
   </classification>
</lom>