Showing posts with label EKP Bronze. Show all posts

Friday, April 23, 2010

What's New in the EKP 6.1 API

Although there are no major new areas of functionality in the EKP 6.1 API, there are several useful enhancements, listed herewith.

  • News feeds can now be filtered by category. Both api/publicNews and api/userNews now support an optional categoryId parameter. Why this is useful: If you are creating a topical portal, you can now restrict the articles shown to those that are relevant to the subject of the portal; for example, an onboarding portal can show articles targeted to the user, with the further restriction that only articles related to onboarding are shown.
  • api/module returns additional information. Specifically, module attributes are now returned, as are prices (currency and amount) for module sessions. (Since module attributes are not always intended for learners, they will be returned only if you authenticate as a System Administrator.) Why this is useful: Price information is essential for e-commerce portals, while module attributes can be used to retrieve implementation-specific data such as a product code to be passed to a payment gateway (if this is not the same as the EKP course ID).
  • Images specified via the Picture URL field are now available in news feeds. (Note that you can always include inline images in your articles using the HTML <img> tag.) Why this is useful: Images add impact to news articles, and being able to include those images on your portal sites will make those sites more engaging.

We hope these enhancements will make the API significantly more useful in EKP 6.1.

Monday, April 5, 2010

Images in News Feeds

EKP's API provides two functions for retrieving feeds of news articles in either RSS 2.0 or Atom 1.0 format. publicNews returns a feed of public news articles (the same articles that would appear on the login page), while userNews returns the personalized news feed for a specific user.

Previously, these feeds did not include any values for the Picture URL field configured for the articles (although they would include images included directly in the text of the articles using HTML markup). However, starting from build 6.0.0.127, these values will be included in feeds when using either the rssfull or atom format. (Picture URL values are not included when using the rssteasers format.)

Since neither RSS nor Atom include a distinct field for images, the value is included as an entity-escaped HTML img element inside the description element (for rssfull) or the content element (for atom). The unescaped img element would look similar to the example below.

<img alt='My Article'
     class='news-image'
     src='/ekp/nd/fresco/repository/myimage.jpg'>

When the img element is entity-escaped and included in a description element (for the rssfull format), the result would look as shown below.

<description>&lt;img alt='My Article' class='news-image'
src='/ekp/nd/fresco/repository/myimage.jpg'&gt; This is the text of the
article.</description>

The equivalent content element for the atom format is shown below.

<content type="html">&lt;img alt='My Article' class='news-image'
src='/ekp/nd/fresco/repository/myimage.jpg'&gt; This is the text of the
article.</description>

Note that the img element includes an attribute class='news-image', which you can take advantage of to apply special styling to these images using CSS if you are including the article text in your own Web pages. For example, the rule below ensures that all such images are floated to the right of the article text.

img.news-image {float: right;}

The rule below ensures that the images are not displayed.

img.news-image {display: none;}

If you want to use the image URL in a way that can't easily be accomplished using CSS, you could extract the URL, for example by parsing the article text into its own DOM and then applying the following XPath expression.

//img[@class="news-image"]/@src

We know that images can add significant impact to your content, and we hope that this change makes it easier for you to use news article images in your portal pages.

Tuesday, March 30, 2010

Can I create a custom search form that displays the search results enclosed in navigation frames?

I've written before about how to link to an EKP page in such a way that the navigation frames are retained. The technique described in that post works so long as the exact URL of the target page (i.e. the page that will be enclosed in the navigation frames) is known in advance.

However, what if you want to provide access to a set of pages for which the exact URLs cannot be known in advance because they depend on input from the user? In particular, what if you want to provide a custom search form that displays the search results enclosed in the navigation frames?

In this case the technique described in the previous post won't work as-is because the exact URL depends on the user's search query. For example, if the user searches for bacon then the URL of the search results page will be as shown below.

/ekp/servlet/ekp?TX=FRAMELESSCATALOGSEARCH&KEYW=bacon

With a little JavaScript ingenuity we can achieve the desired effect. The trick is to add an onsubmit handler to the search form that takes the query and uses it to construct the URL of the target page, which it then uses to populate another, hidden, form field. This requires a JavaScript function contained in a script element that we will need to include in the head of the page's HTML source.

<script type="text/javascript">
 function setMainSrc() {
  document.searchform.mainSrc.value
   = "/ekp/servlet/ekp?TX=FRAMELESSCATALOGSEARCH&KEYW="
   + encodeURIComponent(document.searchform.KEYW.value);
 }
</script>

Below is the form itself, including both onsubmit handler and hidden field.

<form action="/ekp/servlet/ekp/pageLayout"
      name="searchform"
      onsubmit="setMainSrc(); return true;">
 <input name="KEYW" type="text">
 <input name="mainSrc" type="hidden">
 <input type="submit" value="Search">
</form>

When the user enters a query and clicks the Search button, he or she will see EKP's search results page enclosed in the standard navigation frames, even though the original page did not include any frames.

Wednesday, June 17, 2009

Publishing a podcast using the News Manager

EKP 5.6 provides RSS feeds both for public news on the login page and for personalized news on a learner's home page. (Note: RSS feeds are available only if your license includes API access.)

RSS feed link on Home Page

In EKP 5.6.0.129 we have added support for RSS enclosures. Roughly speaking, RSS enclosures serve the same purpose as email attachments—they make is possible to attach a file of arbitrary type to a text message. Probably the most interesting consequence of this change is that it's now possible to use the News Manager to publish a podcast. Here's how.

  1. Record a podcast episode, edit it as necessary, and save as an appropriate media file (audio or video). There are many tools available for recording, editing and encoding media files. For audio, we suggest Audacity for recording and editing, with the LAME MP3 encoder to generate MP3 files.

  2. Upload your media file to the Repository Manager.

    Uploading an MP3 file to the Repository Manager
  3. Create a news article in the News Manager. For the File Attachment URL field, select the media file you uploaded in the previous step. Make sure the article is targeted to the appropriate audience, and publish as usual.

    Creating a news article with attached MP3 file
  4. A listener/viewer can subscribe to an appropriate RSS feed using a “podcatcher” such as Apple's iTunes. The podcatcher will download new podcast episodes as they are made available. The episodes can then be played offline, and can also be synchronized to devices such as portable MP3 players and phones.

    Subscribed podcast in iTunes

Wednesday, June 3, 2009

Publishing a new course revision to learners who have already completed an earlier revision

EKP 5.5 introduced the ability to create new revisions of existing courses. This simplified the process of updating an existing course, and made it possible to keep track of which version of a course a learner was taking or had completed.

When you created a new revision of a course, EKP would automatically make the new revision available to learners who were enrolled in, but had not yet started, an earlier revision. EKP also provided the option to make the new revision available to learners who had already started, but had not yet completed, an earlier revision.

Since we released support for course revisions, several of you have told us that you also needed to be able to make new revisions automatically available to users who had already taken and completed an earlier revision of the course, so that those learners would see the latest content if they reviewed the completed course. So, as of EKP 5.6.0.122, there is a third option when creating a new course revision, which publishes the new revision to all learners, including those who have already completed an earlier revision.

Confirm New Course Revision

We hope this makes course revisions in EKP even more useful.

Tuesday, May 26, 2009

How to bulk import courses that do not have distinct identifiers in their course descriptions

EKP features bulk import utilities for both SCORM and AICC content. Using these utilities, you can package multiple courses into a zip file which you can then upload. EKP will create online modules based on the course descriptions in the zip file. In addition to information on how to launch and track the courses, EKP will extract descriptive information such as course titles, descriptions, objectives and so on. This is extremely handy if you need to import catalogs of hundreds or even thousands of courses.

Previously, the ID fields that EKP would use for the new modules would also be extracted from the course description files. While this usually works well, it fails if the course description files contain duplicate identifiers, since each module in EKP needs to have a distinct ID. This might happen for example if the course description files were created by copying a template and making only minimal changes.

Starting from version 5.6.0.119, the bulk import utilities provide an option to generate module IDs based on the file names of the imported items instead of the identifiers contained within course descriptions themselves. This provides an easy way to import large numbers of courses even if the identifiers within the course descriptions are not distinct.

How do you want the system to select IDs for the courses in this package? * Use IDs specified in the course descriptions * Use the base file names of the source files

The default is to use the identifiers specified in the course description files, as before. If you choose to generate IDs based on the file names and the items being imported are content packages, the IDs used will be the names of the “inner” zip files, without the .zip extension. If the items being imported are sets of AICC course structure files, the IDs used will be the base file names—for example, if one of the sets uses the file names course1.au, course1.crs, course1.cst and course1.des, then the ID used will be course1.

We know that many of you rely on the bulk import utilities to set up and updates your course catalogs, and we hope that this change makes them even more useful.

Monday, September 1, 2008

User accounts and user statuses

Every user account in EKP has a Current Status field which, as of EKP 5.5, can take one of seven possible values. Herewith, a list of the possible values, and an explanation of the usage of each.

Active
The account is available for login.
Suspended
The account is not currently available for login, but is expected to be reactivated in the future. An account can be marked as Suspended by an administrator, or automatically as a result of too many failed logins.
Account Closed
The account is not available for login, and is not expected to be reactivated in the future. However, the account will still be viewable using review and administrative functions.
Logically Deleted
The account is not available for login, and is not expected to be reactivated in the future. Moreover, the account will be hidden in most parts of the system aside from the User Editor.
Self registration user pend for approval
The account was created by a user self-registering with the system. It is awaiting approval and activation by an administrator.
Locked
The account is not currently available for login, but might be reactivated in the future. Similar to Suspended. If specified under System Configuration, accounts are automatically marked as Locked after a period of inactivity.
User Account/Records Migrated
Used to indicate that records that were previously associated with this account have been migrated to a different account. The account is effectively obsolete, but has not yet been deleted.

[This post was updated on October 28, 2010 to remove obsolete licensing information.]

Wednesday, July 9, 2008

Sun Java Plug-in bug and SCORM communication

A few users have encountered the following issue that affects tracking of SCORM courses on a small number of EKP sites.

Symptoms: SCORM courses fail to communicate with EKP, and one or more messages like the one below appear in the browser's Java console.

java.security.AccessControlException: access denied (java.net.SocketPermission www.example.com:80 connect,resolve)

Analysis: This issue is caused by a bug in certain versions of Sun's Java Plug-in. The bug was introduced in Java 6 Update 3, and is fixed in Java 6 Update 10. It affects Firefox and Safari; Internet Explorer is not affected.

Note that this problem does not affect all sites. It appears to affect a small proportion of sites, and is related to the site's DNS configuration.

Solution: Users who encounter the problem described above can apply one of the following solutions.

  • Ensure that your users are using a version of the Sun Java Plug-in that is not affected by this problem. Users who currently have Java 6 Update 3 or above can upgrade to Java 6 Update 10. (Note that, as of 9 July 2008, Update 10 is flagged as “beta.” However, it is the first version offered on the downloads page.)
  • Another solution that appears to be effective is to ensure that each EKP domain (e.g. ekp.example.com) is mapped (via DNS) to a unique IP address. That is, where multiple EKP instances are located on a single server, ensure that each instance on the server is associated with a different IP address.

Sunday, June 15, 2008

When do I need to use the Content Server Configuration settings in EKP Gold?

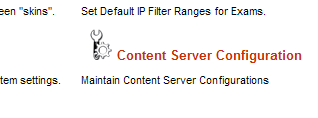
EKP Gold includes a Content Server Configuration page (under Manage > System Administration Manager > System Settings). However, it's not always necessary to explicitly configure a content server in order to enable learners to launch courses from servers other than the EKP server. Herewith, clarification of when it's necessary to explicitly configure a content server, and when it isn't.

Content Server Configuration menu item

EKP's content server configuration settings are designed to help you deliver courses to groups of learners whose connections to the main EKP server have limited bandwidth. You can upload the same course content to multiple content servers, and ensure that, when a learner launches a course, the course content will be delivered to the learner from a server that provides optimal delivery speeds. (The choice of server can be based on either the learner's identity or their network location.)

For example, suppose you need to deliver courses to employees located in your brand new lunar office. Since bandwidth between the moon and Earth is limited, you would like to ensure the course content is delivered to your lunar employees from a dedicated lunar content server, while Earth-based employees will continue to receive course content from your Earth-based server. You can use EKP's content server configuration to ensure that lunar employees receive course content from moon.example.com, while terrestrial employees receive the same content from earth.example.com.

However, there are other reasons besides bandwidth why you might want course content to reside on a different server from EKP. For example, the course content might require a server-side scripting language that is not available on the EKP server. Or the courses might be provided by a vendor that hosts the content themselves instead of providing it as files to be uploaded to an LMS server (which can be extremely convenient if the content is updated frequently). In these cases, although the content for a particular course will be delivered from a content server separate from the main EKP server, it will always be delivered from the same server regardless of the learner's identity and network location.

If the content of any particular course should always be delivered from the same server, even if it is not the main EKP server, then it's not necessary to explicitly configure any content servers, and it's not necessary to be running EKP Gold. In this case, it's only necessary to ensure that the relevant launch URLs accurately reflect the location of the course content (which might require that they be specified as absolute, rather than relative, URLs), and this will work just fine on EKP Silver or EKP Bronze. Note that it's still possible to import the EKP course catalog entries from SCORM or AICC content packages even if the course content will not reside on the EKP server; however, in this case the packages will typically contain only course description files (i.e. imsmanifest.xml and related files in the case of SCORM-conformant courses, or AICC course structure files in the case of AICC-conformant courses), and not the actual course content files. Note also that you might still need to work around cross-site scripting issues—however, it's generally more straightforward to do this by setting up a reverse proxy on the EKP server rather than by explicitly configuring content servers in EKP.

(To be really precise, we should state that content server configuration is required only if the host portion of any course content URLs needs to change based on the learner's identity or location—for example, http://earth.example.com/path/to/content versus http://moon.example.com/path/to/content. This is not quite the same as stating that the courses need to be launched from different servers, since it is possible to map a single host name to multiple physical servers—for example, the single host name earth.example.com might be mapped to multiple physical servers. However, this difference is unlikely to matter in practice unless special content distribution technology is being used.)

Saturday, May 17, 2008

Which catalog fields can EKP extract from the metadata in a SCORM package?

When you import a SCORM or IMS content package, EKP scans the file named imsmanifest.xml that every such package must contain, and extracts certain key information including: the course identifier; the title of the course; and information about the structure of the course including URLs and additional parameters used to launch the individual SCOs and assets.

In addition to this essential information, the package may also contain metadata in the form of a Learning Object Metadata (LOM) XML instance (either embedded in imsmanifest.xml itself, or else in a separate file referenced from imsmanifest.xml). If present, EKP can extract from this metadata any or all of the catalog fields listed below.

  • Description
  • Vendor
  • Duration Comments
  • Objectives
  • Training Hours

Shown below is a minimal LOM XML from which EKP can extract all of the additional catalog fields listed above. The relevant field values are shown in bold text. This example follows IMS LOM as used in SCORM 1.2 packages; however, the same information could be extracted from an IEEE LOM as used in SCORM 2004, and the differences would be minor.

(Note that this is a minimal XML instance from which EKP can extract the values mentioned above. The LOM XML schema denotes as mandatory some elements that are not actually required by EKP, hence this example is not actually valid against the schema, and the SCORM conformance test suite will report it as invalid.)

<lom xmlns="http://www.imsglobal.org/xsd/imsmd_rootv1p2p1">
   <general>
      <description>
         <langstring>Description</langstring>
      </description>
   </general>
   <lifecycle>
      <contribute>
         <centity>
            <vcard>ORG:Vendor</vcard>
         </centity>
      </contribute>
   </lifecycle>
   <educational>
      <typicallearningtime>
         <datetime>02:30:00</datetime>
         <description>
            <langstring>Duration Comments</langstring>
         </description>
      </typicallearningtime>
   </educational>
   <classification>
      <purpose>
        <value>
           <langstring>Educational Objective</langstring>
        </value>
      </purpose>
      <description>
         <langstring>Objective #1</langstring>
      </description>
   </classification>
   <classification>
      <purpose>
        <value>
           <langstring>Educational Objective</langstring>
        </value>
      </purpose>
      <description>
         <langstring>Objective #2</langstring>
      </description>
   </classification>
   <classification>
      <purpose>
        <value>
           <langstring>Educational Objective</langstring>
        </value>
      </purpose>
      <description>
         <langstring>Objective #3</langstring>
      </description>
   </classification>
</lom>

Wednesday, March 19, 2008

NoSuchMethodError when upgrading to EKP 5.0

We've had a few reports of the following problem: when connecting to an EKP site that has been upgraded to EKP 5.0, a "Cannot connect to database" page is seen, and a message like the one below appears in the log file (WEB-INF/logs/ekp.log).

java.lang.NoSuchMethodError: javax.xml.parsers.DocumentBuilderFactory.getSchema()Ljavax/xml/validation/Schema;
 at com.sun.org.apache.xerces.internal.jaxp.DocumentBuilderImpl.<init>(DocumentBuilderImpl.java:110)
 at com.sun.org.apache.xerces.internal.jaxp.DocumentBuilderFactoryImpl.newDocumentBuilder(DocumentBuilderFactoryImpl.java:101)
 at com.sun.msv.verifier.jaxp.DocumentBuilderFactoryImpl.newDocumentBuilder(DocumentBuilderFactoryImpl.java:145)

This appears to happen if EKP is running on an older version of Tomcat 4.1. Older versions of Tomcat 4.1 will override the XML parser libraries that are included in the Java runtime, and these libraries conflict with the versions included in J2SE 5.0, which EKP 5.0 requires.

The simplest solution is to delete the parser libraries that are included with Tomcat 4.1. These can be found in the common/endorsed/ directory under the Tomcat home directory. These libraries are not required when running under J2SE 5.0.

Tuesday, March 18, 2008

Custom login pages

Most EKP sites will use a custom login page rather than the standard page that ships with EKP. This is done by creating a file named login.wm and placing it in the WEB-INF/conf/ directory. The contents of this page are essentially HTML, with some placeholders for dynamic content that use the Velocity Template Language (VTL).

The standard login page, which can be used as a guide, can be extracted from the file WEB-INF/lib/ekp.jar using a zip utility such as WinZip or WinRAR. The location of the page within the ekp.jar file is com/netdimen/tx/auth/login/login.wm for EKP 4.7 and above, or com/netdimen/tx/login/login.wm for EKP 4.6.

One important point that is easy to overlook is that the page should contain the code shown below immediately after the opening <form> tag of the login form.

  #if ($target != "")
  <input type="hidden" name="target" value="$target" />
  #end

This code will ensure that, if a user who is not logged in attempts to access a page that requires authentication (which would happen if the user's session had timed out, for example), EKP will "remember" which page the user was trying to access and forward the user to that page after prompting her to log in. If users are always forwarded to the default start page after logging in, even if they were prompted to log in while trying to access another page, it is most likely because the above code is missing from the login page template.

(Note that the default static index.html page simply redirects the user to the dynamic login page described above. We recommend leaving the index.html page as-is and simply creating a login.wm page as described above, to avoid duplicating the custom login page HTML code.)

If your EKP site is hosted by NetDimensions, these steps will normally be performed for you by our staff.

Thursday, November 29, 2007

Search EKP's catalogs from your browser's search box

EKP 5.0 makes it possible to search EKP's course catalogs directly from the search box of Internet Explorer 7 or Firefox 2.

When a user visits EKP using Internet Explorer 7, the drop-down arrow of the search box "lights up" to indicate that EKP has been added to the drop-down menu.

Internet Explorer's search box with drop-down arrow "lit up"

To add the EKP search provider, select Add Search Providers from the drop-down menu, then select Enterprise Knowledge Platform by NetDimensions.

Adding search provider from drop-down menu

Internet Explorer will prompt you to confirm that you want to add the search provider.

Add Search Provider confirmation dialog box

After clicking Add Provider, select Enterprise Knowledge Platform by NetDimensions from the drop-down menu.

Selecting EKP from the drop-down menu

With the EKP search provider selected, initiating a search from Internet Explorer's search box opens EKP's catalog search results page directly.

Search box with EKP search provider activated

Similarly, when a user visits EKP using Firefox 2, the drop-down arrow of the search box "lights up" to indicate that EKP has been added to the drop-down menu.

Firefox's search box with drop-down arrow "lit up"

To add the EKP search provider, select Add "Enterprise Knowledge Platform by NetDimensions" from the drop-down menu.

Adding EKP search provider from drop-down menu

With the EKP search provider selected, initiating a search from Firefox's search box opens EKP's catalog search results page directly.

Search box with EKP search provider activated

Sunday, September 2, 2007

How can I publish an Articulate Quizmaker quiz as an AICC course package that I can import into EKP?

Articulate Quizmaker is capable of publishing quizzes as both SCORM and AICC content. EKP can import and deliver both formats. One advantage of publishing as AICC content is that learners do not have to have Java installed in order to take the quizzes. However, there are a few points to bear in mind when publishing Quizmaker quizzes as AICC content. By following the steps below, you can publish a quiz as an AICC course package and import the package into EKP.

  1. Click the Publish button in the Quizmaker toolbar. The Publish button in the Quizmaker toolbar
  2. In the Publish window, choose LMS from the left menu. The LMS button in the left menu of the Publish window
  3. In the LMS field under Output Options, select AICC. LMS field under Output Options
  4. Click Reporting and Tracking... Reporting and Tracking... button
  5. Under LMS Course Information in the LMS Metadata window, complete the Description and Creator fields. Description and Creator fields under LMS Course InformationNote that if you leave these fields blank, Quizmaker will omit these fields from the published AICC files, resulting in files that are invalid according to the AICC specification. Therefore, in order to produce a valid AICC course package, you must complete these fields before publishing the quiz.
  6. The default value of the Filename(URL) field is http://www.servername.com/quiz/index_lms.html. While it's possible to replace this with the full URL at which the quiz will be published, it's easier to simply remove the initial portion so that the value becomes just index_lms.html. (Note that the value should not contain any slash characters.) Filename(URL) fieldIf you then import the quiz into EKP as an AICC course package as described below, EKP can automatically deduce the full URL needed to launch the quiz.
  7. Click the OK button to dismiss the LMS Metadata window. OK button
  8. In the Publish window, under Output Options, ensure that the check box labeled Zip files is checked. Zip files check box
  9. Click Publish. Publish button

The resulting zip file can be imported into EKP using the Import Content Package function (Manage > Catalog Manager > Import Content Package)—simply follow the on-screen instructions.

In summary, the important points are as listed below.

  • Be sure to complete the Description and Creator fields in the LMS Course Information section of the LMS Metadata window.
  • Enter index_lms.html in the Filename(URL) field.
  • Under Output Options in the Publish window, ensure that the check box labeled Zip files is checked.
  • Import the published zip file into EKP using the Import Content Package function.

Thursday, July 26, 2007

Can I launch courses directly from a portal so that learners don't have to log into EKP, but still have EKP track the learners' progress?

In order to link to a course so that the course launches immediately, and is tracked by EKP, you can link to the launchByCourseId transaction, e.g.:

/ekp/servlet/ekp/launchByCourseId?courseId=My_Course

(Note that this requires that the learner already be enrolled in My_Course, so you might want to pre-enroll learners using a Group Enroll or Auto-Enroll.)

If you link directly to the URL above, and the learner does not yet have a session with EKP, she will be prompted to log in as normal. In order to achieve “transparent login”, you can use one of the two mechanisms described below.

  1. Implement the "external authentication service" mechanism. To implement this, the portal would need to be modified to generate “authentication tokens” (cryptographic hashes) when requested by EKP. Then, EKP's configuration is modified so that, when it needs to authenticate a user, it redirects to the portal to request an authentication token instead of showing the standard login page.

    Note that this mechanism has the significant advantage that it is not required that users' passwords be synchronized in the two systems. In fact, when using this mechanism, the passwords stored in EKP's database are never used.
  2. Use the standard verify transaction. This is the transaction that is used to validate a user ID and password submitted using the normal login page. It is possible to add a target parameter to specify the page to which the user should be redirected after a successful login (instead of the normal home page). In particular, if you want to start a course after login, you can specify the launchByCourseId transaction (with appropriate courseId parameter value) as the value of the target parameter. E.g.:
    /ekp/servlet/ekp?TX=VERIFY&UID=joestudent&PWD=password&target=%2Fekp%2Fservlet%2Fekp%2FlaunchByCourseId%3FcourseId%3DMy_Course
    Note that the value of the target parameter has been percent-encoded.

    The above example includes the parameters in the query string—however, for security reasons you should avoid including the user ID and password in the URL—therefore, the portal should be coded to use the POST method rather than GET to invoke the verify transaction.

Note that, unlike method 1, method 2 requires passwords to be synchronized between the two systems, which could be difficult to achieve if passwords are changed regularly (a good security practice). (This problem can be avoided by configuring both systems to use the same directory server, i.e. Active Directory or LDAP.) In addition, method 2 requires embedding the user's password in an HTML page (or HTTP redirect header), which might be cached. For these reasons, we recommend using method 1 if possible.

Thursday, June 28, 2007

Can I remove the calendar view that displays on the right side of the Enrolled Learning Modules tab?

By default, EKP displays a calendar view on the right side of the Enrolled Learning Modules tab.

Enrolled Learning Modules tab with calendar view

This calendar view can be hidden for a specific skin by adding a Cascading Style Sheet (CSS) rule to the main style sheet for the skin. The rule is as shown below.

.enrolled-learning-modules-calendar {
   display: none;
}

For an explanation of how to locate the file to which this rule should be added, see this previous post.

Please note that this requires one of the following builds: EKP 4.5 build 190 or higher; EKP 4.6 build 61 or higher; or any EKP 4.7 build. The CSS rule will have no effect on earlier builds.

Wednesday, May 16, 2007

Automatic enrollments based on elapsed time since Join Date

A few weeks ago I wrote about the relationship between auto-enroll rules and prerequisites.

Here's another enhancement in EKP 4.7: it's now possible to define an auto-enroll rule based on elapsed time since the learner's Join Date.

Auto-Enroll Target: Join Date is at least 60 days ago

This should be very useful to anyone looking to deliver staged orientation training using EKP. It could also be used to solicit feedback from new hires by assigning a short survey a month or two after they join the organization.

Monday, April 30, 2007

The Other Resources tab

In addition to the News, Enrolled Learning Modules, Pending Enrollments and Records/Transcript tabs, EKP 4.6 provides an option to include a tab labeled Other Resources on learners' Home Pages.

However, until now this tab was pretty much reserved for Books24x7.

As of EKP 4.6 build 102, it's possible to target any enrollable learning module (but not programs) to the Other Resources tab instead of the Enrolled Learning Modules tab. This is done on the Define Module Properties page of the Catalog Editor—simply check the check box labeled Show on Other Resources tab instead of Enrolled Learning Modules tab (tabbed interface only), then click the Save button in the top frame.

This would typically be appropriate for modules that function as reference resources, rather than as activities or tasks that the learner would be expected to complete.

Sunday, April 29, 2007

Multiple GlobalEnglish accounts on a single EKP site

About three years ago, we added to EKP the ability to integrate with GlobalEnglish, which provides online English language instruction to global companies. An administrator can create a module in EKP that acts as a gateway to the GlobalEnglish portal, and can then control access to GlobalEnglish in using EKP's standard enrollment mechanisms.

Prior to EKP 5, the GlobalEnglish account details were specified as part of the system configuration. Consequently, only a single GlobalEnglish account could be used with each EKP instance.

However, in large global companies, separate departments sometimes have distinct GlobalEnglish accounts. In EKP 5, we've made it possible to specify GlobalEnglish account details as part of the module configuration, making it possible to use multiple accounts with a single EKP installation.

Here's how to create a module for GlobalEnglish access in EKP 5.

  • Go to Manage > Catalog Manager > Module Editor.
  • Click the Create Learning Object button in the top frame.
  • Enter a Learning ID for the module, and ensure Online is selected as the Learning Type, then click Create.
  • On the Define Module Properties page, enter a Title and Description for the module.
  • Go the the Define Launch Properties page.
  • In the Launch Interface drop-down list, choose GlobalEnglish.
  • In the Keycode field, enter the account keycode as provided by your GlobalEnglish representative.
  • Click the Save button in the top frame.

Monday, April 23, 2007

Automatic enrollments and prerequisites

EKP makes it possible to define auto-enroll rules for module and program sessions. These ensure that specified groups of learners will automatically be enrolled in the session the first time they log into EKP, even if those learners don't yet have accounts in the system.

In EKP 4.6 and earlier, auto-enroll rules would always override any prerequisites that had been defined for the module. In EKP 4.7, this behavior is configurable using the Ignore prerequisites for automatic enrollments property under Manage > System Administration Manager > System Configuration > System Configuration.

If this property is disabled, auto-enroll rules won't take effect until all prerequisites for the module are satisfied. This makes it possible to establish paths of learning. For example, an administrator could create an Advanced Project Management program or module, with an Introduction to Project Management program or module as a prerequisite, and define auto-enroll rules for the appropriate learner groups. Once a learner in one of the appropriate groups has completed the introductory program or module, she will automatically be enrolled in the advanced program or module the next time she logs into the system.